TEMPLE HOLE 1
{{ content }}
GOLF /
THE COURSES


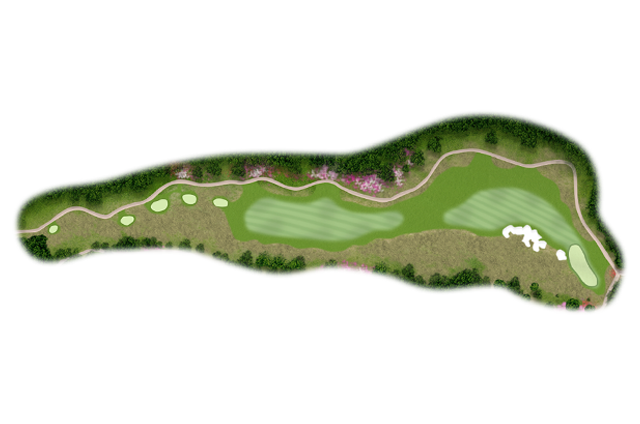
Hole 1
360 Yard
/ Par 4, Handicap 8
The fairway of this visually stunning starting hole is wide but deceiving. Long drives played too far left may leave a second shot behind a set of pine trees left of the approach to the green. The best tee shot is a shortened one that favors the right side near the fairway bunker. A slow-moving stream crosses in front of the green, which is large and undulating.
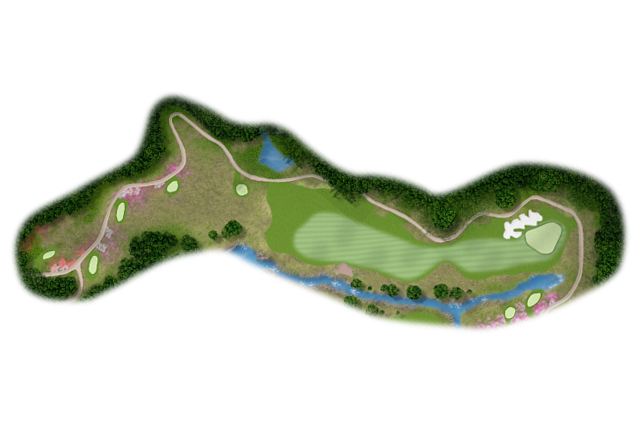
Hole 2
570 Yard
/ Par 5, Handicap 1
Take your time navigating this long challenging hole that gives you a little bit of everything - down and up, and narrow and wide. The fairway is narrow and double-tiered at the 1st landing area, requiring both distance and accuracy for the drive if the long hitter wants to try to reach in two. A safe second shot plays down to the wide fairway left to the green. A third shot then plays uphill to a long and narrow green that seems to hang on the edge of the mountain.
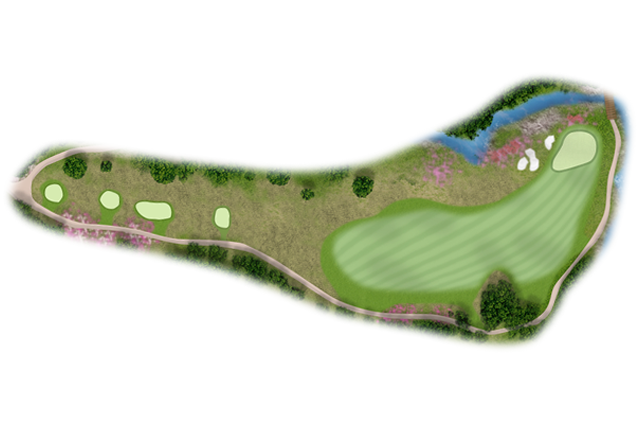
Hole 3
472 Yard
/ Par 4, Handicap 4
Sitting at the high point of the property, the 3rd tee shot is as fun and dramatic as it gets. The fairway, some 70 meters below the tee, winds between a dry creek channel on the right and a native hillside on the left to a green tucked into an hillside of oaks. The best tee shots are positioned near the channel to provide the better angle to the green. Drives too far left may be blocked out by the hillside. Contrasting the feeling at the tee, the green is one of the most intimate and isolated spots on the property.
Hole 4
439 Yard
/ Par 4, Handicap 3
Both distance and accuracy on the drive are required to tame this long and narrow ascending hole. A conservative shortened tee shot will leave the player a long uphill second to a daunting green, whose surface is mostly blind. A tall hillside on the right extends into the green and turns approach shots towards the more difficult left side pin positions.
Hole 5
439 Yard
/ Par 4, Handicap 6
Falling slowly downhill, the fairway is wider than it appears and offers two clear choices of play. Shortened drives to the right are awarded a flatter lie, but given a tougher angle to the green that may require a forced carry over a greenside bunker. Longer drives favored left over a fore-shortened bunker will probably yield uneven downhill lies for the second shot. A stream crosses in front of the green, which is open on the front left and slopes gently to the back right.
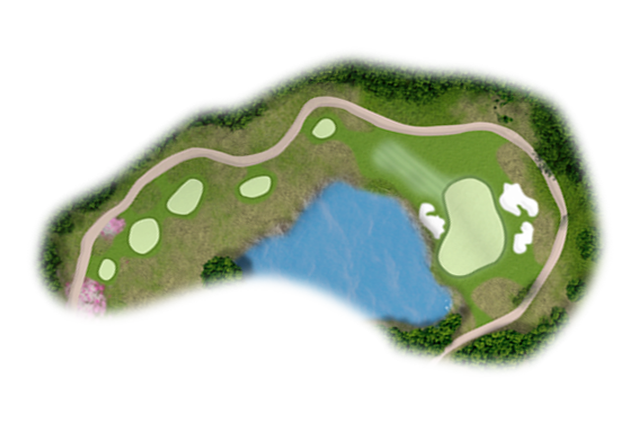
Hole 6
163 Yard
/ Par 3, Handicap 9
The green is wide on this short downhiller and a slope in the middle of the green splits it into three sections for pin positions. On the left, the green is open and offers a safe choice that avoids having to go over the lake. Pins located on the right are clearly more challenging, as tee shots must clear the lake and front bunker.
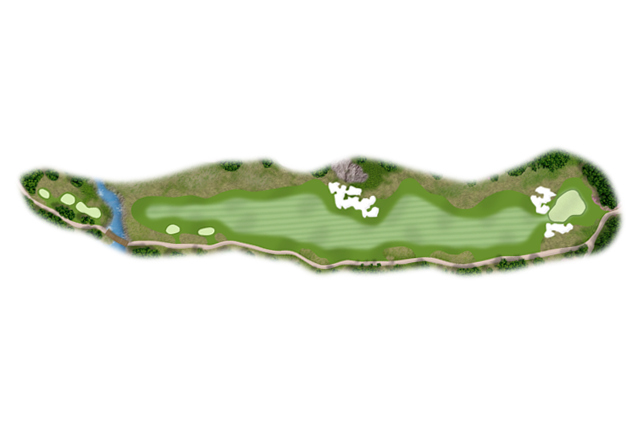
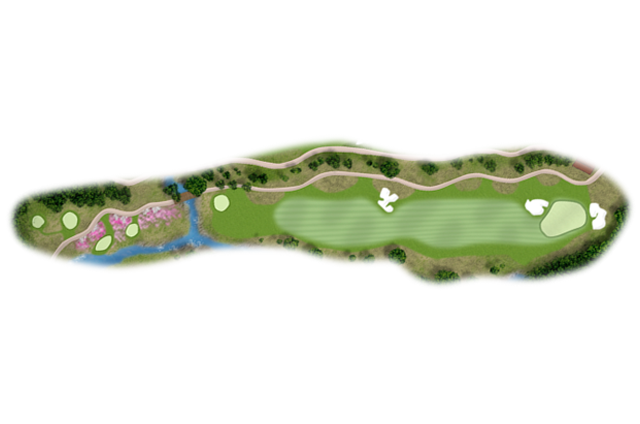
Hole 7
532 Yard
/ Par 5, Handicap 7
The shortest par 5 at Whistling Rock ascends gently uphill alongside a rock face bordering the right side. A large sprawling fairway bunker on the left side will catch long drives that don��t favor the right side. The green, surrounded by the tallest Japanese Pine trees on the property, is elevated and guarded by front bunkers on both sides, so it is not receptive to low-angled shots. Approach the green with a high pitch shot and birdies should be attainable.
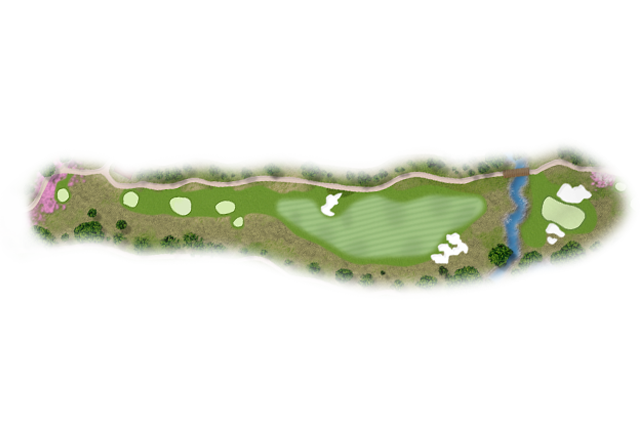
Hole 8
382 Yard
/ Par 4, Handicap 2
This short par 4 features a wide fairway that wraps around a native depression on the left and quickly narrows to a small green hanging on a ledge. The fairway offers multiple landing zones from which to attack the target and, appropriately, the most level lies are closest to the danger left. Use the prominent ridge crossing the fairway in the “driver zone” to shunt your ball towards the narrow but level approach to the green. Hit away from the danger and take your chances with slopes and partially blind approach shots.
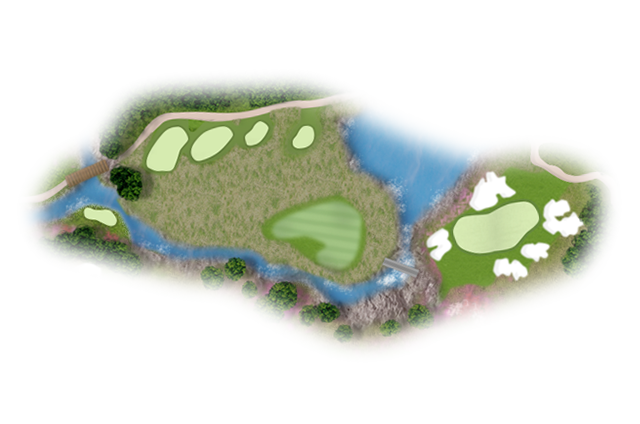
Hole 9
202 Yard
/ Par 3, Handicap 5
The 9th is a par 3 that offers one of the most spectacular views on the property and an exhilarating finish to the Temple course. A large green sits below the massive clubhouse and on the opposite side of a deep gorge. Surrounded by five bunkers, the green climbs from the gorge uphill to the left. The shot is all carry��and 100% fun.