COCOON HOLE 1
{{ content }}
GOLF /
THE COURSES

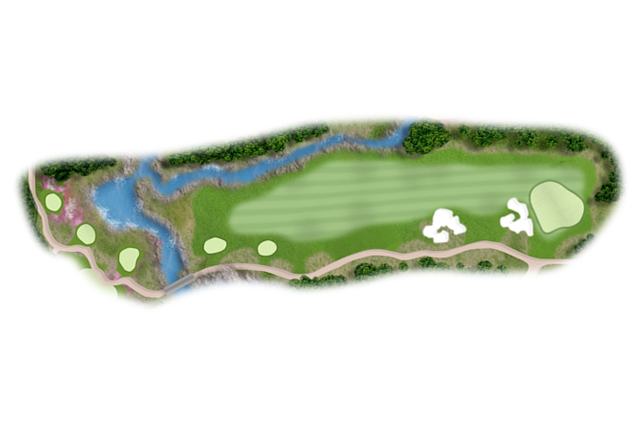
Hole 1
342 Yard
/ Par 4, Handicap 8
The leading hole on the Cocoon provides visual comfort and only the smallest glimpse of the adventures and challenges to come. Avoid the stream bordering the left side of the hole. A smart tee shot will lay up short of the bunker on the right; a longer and bolder drive will play nearest the stream and past the bunker.

Hole 2
591 Yard
/ Par 5, Handicap 3
Let it fly off the tee, although a tee shot favoring the right side may give the long hitter a chance to reach the green in two over a long lake that stretches to the green. The safe player will hit his second shot left of the lake in between a set of bunkers. The green is a “zero edge” green with a breathtaking clear view of a pristine mountain hillside in the background.

Hole 3
470 Yard
/ Par 4, Handicap 1
A true test of length and accuracy, the 3rd hole climbs slowly uphill to a green site surrounded by bunkers. The tee shot can be played safely to the left but will leave a long shot to the green; or carry the fairway bunker on the right, and gain an advantage of a shorter 2nd shot and a better angle to the green.
Hole 4
352 Yard
/ Par 4, Handicap 6
Options abound on this spectacular short hole that is defined by a large rock outcropping sitting between the green and a lake. The clear first option for the daring player is to launch it straight in the air over the lake and rock and onto the green. More cautious players will pick a spot in the wide fairway to the left which will give them the best angle to the pin for their short second shot.

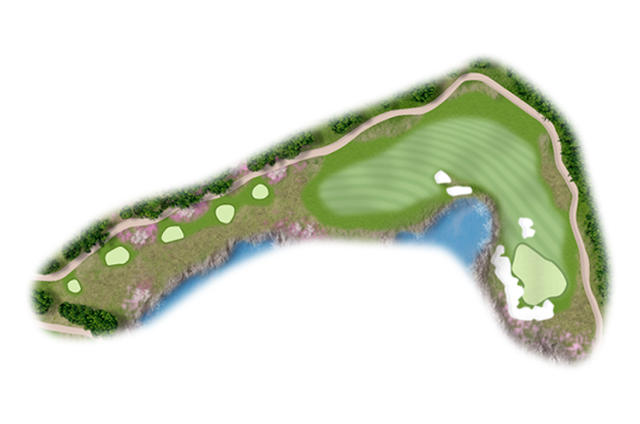
Hole 5
178 Yard
/ Par 3, Handicap 9
The setting for the 5th hole is the most secluded and intimate setting on the Cocoon side. The two-tiered green is nestled into a small ledge in the mountainside . Large bunkers collect short shots in front of the green and catch long shots behind. Real danger lurks for the golfer missing the green right, where the mountain falls down quickly to the valley below. The green is two-tiered and offers a safe route up the left side around the front bunker.
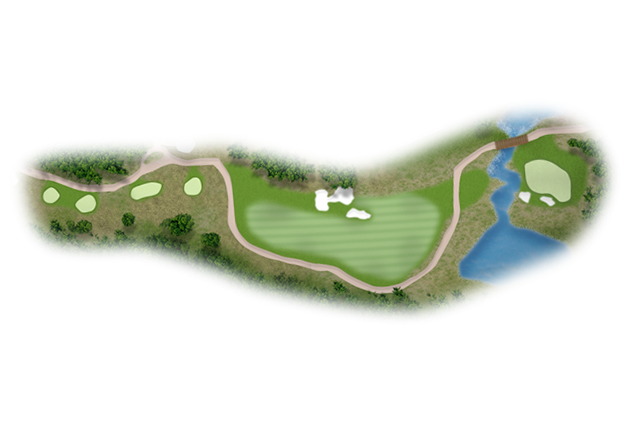
Hole 6
354 Yard
/ Par 4, Handicap 4
The fairway of the short par 4 6th occupies the lowest ground of the golf course, but still sits high enough to provide one of the best views of the mountains in the distance. The hole plays level from tee to fairway and then moves sharply uphill and to a green tucked left and guarded in front by bunkers and a stream falling fast to the players right. From the tee, players can try to clear the bunkers left of the fairway, but will find an arduous uphill approach from an uneven lie. A shortened drive to the right yields a flatter lie, but will still require an accurate shot to one of the most undulating greens on the course.

Hole 7
617 Yard
/ Par 5, Handicap 2
A beast of a hole with unparalleled visuals at the tee, the 7th slowly climbs up the mountain back towards the clubhouse, The fairway plays between trees and bedrock and terminates at a beautifully sloped green in a small bowl surrounded by forest. The tee shot must carry a lake which is fed by a striking waterfall to the players right. The second is best played as a ‘position’ shot with the third shot in mind. The green wraps around an overhanging pine tree on the left and offers an incredible tucked back pin.
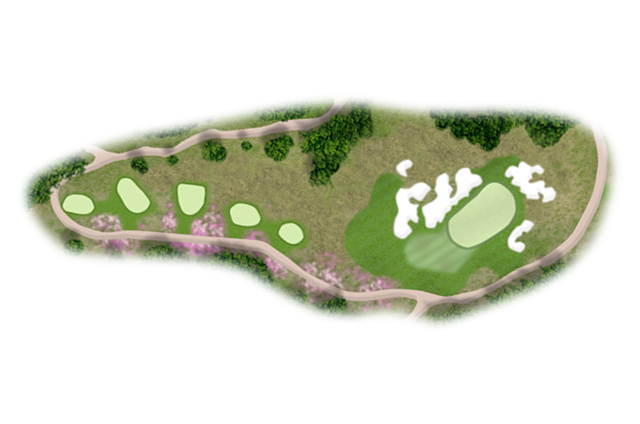
Hole 8
205 Yard
/ Par 3, Handicap 7
A downhill beauty, the 8th is guarded by two large bunkers, that makes any shot to the left half of this gently rolling green a forced carry. Players may bail out to the right, but will face a delicate uphill chip shot to save par.

Hole 9
410 Yard
/ Par 4, Handicap 5
This finishing hole offers two options off the tee that should be chosen depending on the pin position. The fairway is wide but not without danger. Play a tee shot right to a small upper ledge of the fairway to have the best angle to a left pin. Play over a bunker to the wider fairway left when the pin is located right, behind the front greenside bunker. A lake must be carried to reach the green, so a “laid-off” tee shot is not recommended. Cocoon 9 was recently modified. New pictures coming soon.
Click here for more information.